

mikew
-
Posts
520 -
Joined
-
Last visited
Never
Content Type
Forums
Blogs
Events
Downloads
Gallery
Membership & Shop
Posts posted by mikew
-
-
Quoted from James
MikeTime to bring this threaad back to life as I have started my Stag EFI project, and now have most of the electronics.
I have opted for the new Microsquirt module, it doesn't have some of the advanced features of Megasquirt, but it arrives ready built in a water resistant housing and will do all that I need. Mappable Ignition, 8 injectors (not sequential) and needs EDIS, and its cost effective compared to Megaquirt.
So I have the new Microsquirt,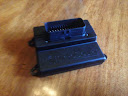
tuner studio and the following bits:-
Edis 8 Module and 2 coil packs, GM Coolant, Air Temp Sensors and BAR Sensor.
Techedge 2 and Wideband Lambda
Trigger wheel and pickup
relays
Rover recon Throttle Body
I have already powered up the Microsquirt and connected to Tuner Studio, so all the defaults are ready loaded.
I spent today figuring out where the various parts would fit in and around the Stag, as I want to get the Microsquirt etc located so I can build the project up. Once the ECU and associated parts are fitted I intend to get the car running in the EDIS limp mode, which will have the trigger wheel and ignition sorted. But to save "lash ups" I intend to power the EDIS via the ECU relays, just leaving the io connections to the EDIS off
Coil packs are going here on the drivers front inner wing
with the EDIS module close by
wiring for this lot can follow the path back (with the power feed for the ECU) of the existing headlamp wiring, to the passenger footwell, it also leaves the pick up sensor run short and away from the other wiring
luckily, above the main wiring loom grommit into the car, is a spare unused 1"3/4 grommit which will take the ECU wiring.
the ECU and other parts are going to be mounted on an alloy plate behind the passenger dash shelf - this will fix under the existing relay panel mounts
to the right of the relay panel, and I made up a cardboard template for this
Which will give me a panel like this
there's just room for the Techedge controller above the relays.
Here's the throttle body I am using, its a recon MG one rated at 160hp so should be about right

I have removed the radiator hoses, and front pulley, so that I can get the trigger wheel mounted, and the pick up sensor.
Hopefully ( work dependant) I'll have all this in place next week and see if it will run with EDIS
Once thats done its work on the manifolds, I am still debating to have some cast, or simply to build them from alloy tube.
Water circulation is easy, the manifolds (probably 2 separate ones - to ease V water sealing!) will have take offs from the rear of the manifold which I intend to feed to the radiator via this
Its a Range Rover P38 thermostat housing, and it has a bypass thermostat and pump bypass take off off so will suit the Stag
ECU water temp sensor can go in the rear housing at the back of the engine's driverside head, IAT Sensor and Servo take off anywhere in the plenum (or plenums) - may be 2 joined with a flexible Y to the Throttle BodyIt's not McJim's wife is it ? ;D
[quote=MWG445]Why not concentrate on driving the Alps from west to east and back again like the Alpine Rally of old where Triumphs did rather well.
The start and finish could be around Grenoble, missing out the marathon to get to the rally interesting roads.
Alternatively there could be a tour of the western Alps and the likes of the Grandes Goulets (look them up on Google Images) on one trip and the next trip, two years later, do the Eastern Alps and the likes of the Stelvio and Gavia.
By getting rid of the long sections getting to the interesting roads as part of the route, there would be more time spent driving on phenomenal roads that are bypassed for the reasons of time constraints.
In addition, more time could be allocated to visiting places such as the Schlumpf Museum at Mulhouse or the Ferrari factory at Modena.
Or even try and gain access to the likes of Monza, Spa or some other motor racing circuit.
10 Countries was a good idea, and still is, but the one drawback was this target of visiting all 10 countries and perhaps missing out on some epic roads due to the necessity to keep to a tight time schedule.
There's nothing wrong with the basic premise of the 10 Countries but perhaps we should think about whether it should evolve into something different.
Jim.[/quote
I don't like agreeing with a lambrini drinking man from Scotlandshire,. but I thing thats a really good suggestion. might even be able to encourage him away from deep fried Mars bars, to do this in his hairdressers TR7 ;)MWG445 wrote:
Pass me my Lambrini. All of it!
Jim.
We did bring you a bottle. In case you turned up :)Car 13 tried to post messages but none Appeared
Got wifi tonight though
The ct crews draNk the holiday inn in Italy out of beer last night
Great time sunshine every day. Temps into 38 degrees. Sun forecast for tomorrow so I reckon we will do the entire run topless in the stag
Great roads. Great exhaust noise in the 5km tunnel today
More news to follow after a few beers in the sunshine at the holiday inn in singenWe have just had to amend our travel plans due to work commitments - we are now getting a Eurotunnel trip Thursday morning - 6am, so there's a spare hotel room available in Calais on Wednesday night if anyone is interested.
Anymore work jobs come in and we will need to cancel - so crossing our fingers that we see you all at the start.
I was going to wash and polish the car, not time for that now.
Mike & Anne Car 13 - I knew this was an unlucky number ! :'(Car 13, its worrying, nothing to do. Haven't needed to lay a spanner on it since before the Auto Eccosse.
Its done 2500 plus miles since, by rights there should be things to attend to, but nothing, so I am sure it'll bite back at some point.
At least no worrying about leaks and noises from Prototype 4 wheel drive bits.
Just got to stick the rally plates on, my French Toll tag and the Swiss stickerworth looking at this bbc article http://www.bbc.co.uk/news/world-europe-23619783 about the French in their war against english drivers
4462 wrote:Hello to all...
Perhaps the 123 Ignition is not common in UK ???
http://www.123ignition.nl/index.php
Regards
Winfried
I have bought one but not got round to fitting it.
also if its an early car the rev counter needs modifying to work correctly. the late rev counters are usually ok
mike
The leak is from the lower water pump seal.
The hole in the block is there to allow water out before it gets past the lower oil seal and into the sump.
Sometimes these leaks cure themselves with a little bit of running, but its an expensive risk potentially involving head gasket failure if you loose too much coolant.
So its carbs and inlet manifold off to get at.
Renew seals (oil and water ) and bearing.
LD Parts do a kit - buy the good RHP bearing NOT the cheap one
Its worth looking at his modified seal kit, which uses a ceramic face - I have done this on a few TV8s with excellent results, and it only involves a little machining on the impeller - which he will get done or any local machine shop can do for a drink.
The seal tends to fail due to rust on the impeller face where the seal bears, replace the face with ceramic, no rust, no more failures
Its 2 - 4 hours work - also get the Payen inlet manifold gaskets - these have the water channel so that poor sealing on the faces doesn't flood the engine, but again leasks into the V
The leak is from the lower water pump seal.
The hole in the block is there to allow water out before it gets past the lower oil seal and into the sump.
Sometimes these leaks cure themselves with a little bit of running, but its an expensive risk potentially involving head gasket failure if you loose too much coolant.
So its carbs and inlet manifold off to get at.
Renew seals (oil and water ) and bearing.
LD Parts do a kit - buy the good RHP bearing NOT the cheap one
Its worth looking at his modified seal kit, which uses a ceramic face - I have done this on a few TV8s with excellent results, and it only involves a little machining on the impeller - which he will get done or any local machine shop can do for a drink.
The seal tends to fail due to rust on the impeller face where the seal bears, replace the face with ceramic, no rust, no more failures
Its 2 - 4 hours work - also get the Payen inlet manifold gaskets - these have the water channel so that poor sealing on the faces doesn't flood the engine, but again leasks into the VNick_Jones wrote:
It may be that they have a central gudgeon pin and orientation does not matter, but I'm pretty sure every other Triumph engine I've built has had pistons with offset gudgeon pin......
Nick
Agreed.
i'd always assumed the markings are to be "read from the front" so all aligned the same and with the marks readable from the left hand side of the engine - if that makes sense
391 wrote:Sorry, slight thread drift,
Andy,
You'd be the man to know, can a cam change be done on a Mk1 without removing the engine? Or does the nose cone prevent this?
It can be done, but you need to cut a round camshaft sized hole in the nose cone :)391 wrote:Sorry, slight thread drift,
Andy,
You'd be the man to know, can a cam change be done on a Mk1 without removing the engine? Or does the nose cone prevent this?
It can be done, but you need to cut a round camshaft sized hole in the nose cone :)timbancroft61 wrote:In the vain attempt to a)to return this thread to its original topic .
WHY ? its far more fun discussing McJim's drinking habits ;D
MWG445 wrote:
Lambrini ain't cheap! ;)
Jim.
Not in the quantities you collect anyway ;D ;DIf you are very very lucky it will be the hydraulics, but I have clutched (sorry) at such straws in the past. I now know by bitter experience, that it probably isn't the easy cheap and simple option, however I would be delighted for you to prove me wrong.
Look on the brightside, at least gearbox removal in a 6 doesn't involve the same lying on your back under the car while dirt and grease and oil drop on top of you as a big saloon or stag does :)Where to start with suggestions on these, sticky clutch can be lots of different things.
Cross shaft pin failure - normally just go and no clutch disengagement possible. :o
Sticky clutch - check / renew the following
clutch actuating rod in slave cylinder and pin - hole worn oval
cross shaft bearings worn.
cross shaft worn
wear on the pins that engage the release bearing carrier.
wear in the carrier where the pins locate
wear on the gearbox nose where the bearing carrier sits
internal wear in the bearing carrier from the gearpox nose
gearbox not concentric with flywheel - dowel bolts not used.
because of non concentric gearbox alignment pressure plate has "funny" wear on fingers where release bearing has ground into it
spigot bearing in crank shaft
or usually ALL of these.
Its what, 5 hours to pull and replace a box in a 6 ? so I usually replace the lot! - if you scrimp and change bits you'll be sick of pulling the box in and out until you fix it.
oh and make sure release bearing is GOOD quality, before it fails quickly after replacement - worth looking at the buckeye site which covers all this in some detail
happy days, well you would by a custard coloured car, what do you expect ? ;D ;DMikeyB wrote:so I'm guessing a new hole has to be made in the bulkhead for the clutch master too then?
Yes, a normal size master cylinder hole, and two bolt nounting holes
BMW master cylinder has metric unions too, so the pipe nuts need changing as wellstagdad wrote:
Mike did you have to move the clutch M/C over to fit the bmw servo in?
Cheers Steve
Yes, this moves 30mm or so towards the centre of the car, on a bracket that you weld to the pedal holder. the pedal remains where it is, and uses an offset pin to connect with the master cylinder
the inner wing requires modification too ( large hammer required) to make a little space for the larger servo, and the servo mount holes need redrilling.
It reduces pedal pressure enough for Anne to be comfy driving it. ALso replacement bmw master cylinders are £38 so when it needs attention its cheap
ajp wrote:cheers Lovely!
If you are after a stag master cylinder I have one in my pile of bits that you are welcome to, drop me a pm with your address and Ill stick it in the post. It was working Ok when removed - I fitted a bmw servo and master cylinder to my stag - reduces the pedal effort for Anne.smithy wrote:Not sure how I missed this, but just saw it and decided it did need photoshopping. Now it requires a caption, methinks,
How about "Raiders of the Lost Lambrini" ??I have found all the replacement bimetalic indicator units are unreliable, no where near as good as the originals
I usually replace them with an electronic unit which need a small rewire, as it needs an earth, as well as the 12v feed and the output to the indicator switch. The third terminal on your unit feeds the indicator dash lamp I think. Easy way to check, this should be on, when the main indicators are off, and vice versa. You could use the electronic one by looping this feed into the electronic flasher output that feeds the indicator switch and turn lamps.
Halfords tend to stock the electronic ones - about £10 if I recall. They have the connections on the packing too so are easy to move the lucar connectors to the correct terminal, but it won't be a simple plug and play because of the earth. Don't buy the trailer repeater flasher units - they are not suitable
or on ebay item 280969266962 - I have the pin outs for this if required - but they are usually on the packing material £.6.65 inc postage
Fit and forget, have a good "tock" sound too, and flash at a constant rate unrelated to battery voltage too
Stag Engine PI and manifolds
in Engine
Posted
Its got a ceramic insulator between the body and the element, so heat soak should be Ok, its one of the items to be "played with" when I make up the manifolds, but certainly it should be somewhere near the throttle body